I had enabled the desktop environment for my VM installation and received the familiar pop-up to install VMWare tools. These tools provide outstanding support when working within the virtual machine.
Since my VM was a clean install, there were a few system changes which needed to be completed before running the installer. The installer request generally pops-up from the bottom of the VM player, and is already mounted as a virtual disk; under the CDROM.
Before you can begin the install though, a few things must be in place already. These are the compiler and some kernel updates. These are pretty straightforward, so here we go. All commands are entered using su access, although you may need to escalate your privileges based on your security model.
Install GCC – the compiler
yum install gcc -y
After the compiler is done, we update the kernel. Most people are weary of a kernel upgrade, the process is no where near as cryptic as it was over a decade ago.
yum update kernel -y
This process may not do anything if your kernel is already up to date.
Now we need to add a few things to the kernel environment, and call gcc to compile it.
yum install kernel-headers kernel-devel gcc make -y
Once completed, you need to reboot the system.
init 6
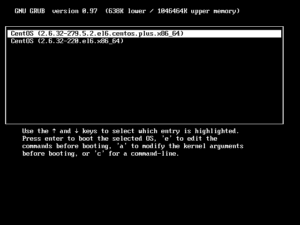
 After reboot you may be prompted to select the kernel you wish to use, the default highlighted one is fine.
After boot my system takes me into the GUI for the OS. The VMWare tools bar will appear again near the bottom of the screen. Go ahead and click inside main window, the OS, and then click “install tools”. VWWare tools will pop-up a folder for the install process, but if your account does not have su access this will fail. It’s a very good suggestion to have your logon account not be a su account.
Within the new window with be a tar.gz file, double click this to open the file, then drag the folder inside onto the desktop. Now we need to escalate our privileges to the su level to complete the install. From a terminal window within the GUI, or via SSH access, escalate to su.
Change directories to the VMWare tools folder. The “username” is the name used for your GUI logon. Then execute the installer. Remember you need to be logged in as su for the installer for work.
cd /home/username/Desktop/vmware-tools-distrib
./vmware-install.pl
You will see a number of prompts, with most data already filled in for you. The defaults are generally OK, unless you want something special initiated. After install, you will need to reboot.
init 6
You now have VMWare tools installed to make your desktop to desktop VM a smoother operation!
If you liked this article, then please follow me on Twitter and Facebook.